If you manage a Redis Sentinel deployment and need to inspect keys or run commands during an incident from your iPhone, the first obstacle is discovery. Sentinel clusters do not have a single fixed address: the primary can be on any node, and it changes during a failover. CacheDeck handles that discovery and reconnection natively, so you can reach a Sentinel-managed cluster from iOS the same way you would reach a standalone instance.
What Redis Sentinel does
Redis Sentinel is a high-availability system for Redis. It runs as a separate process on one or more nodes, monitoring a primary/replica topology. When the primary becomes unreachable, Sentinel coordinates an election among replicas and promotes one to primary. Clients that speak the Sentinel protocol query Sentinel for the current primary address rather than hardcoding it, which means they survive a failover without manual reconfiguration. In a typical setup you have a primary, one or more replicas, and three Sentinel processes; clients talk to Sentinel first, learn the current primary address, and then connect directly.
How CacheDeck connects to a Sentinel cluster
Rather than requiring you to track which node is currently primary, CacheDeck speaks the Sentinel protocol directly.
When you configure a Sentinel connection, you provide two things: a list of Sentinel seed addresses (one or more host:port pairs, default port 26379) and a master name (the identifier that matches the sentinel monitor directive in your sentinel.conf, typically something like mymaster).
When you tap Connect, CacheDeck sends SENTINEL get-master-addr-by-name <master-name> to one of the seed addresses. The Sentinel node responds with the IP and port of the current primary. CacheDeck then opens a standard Redis connection to that address. From that point on, the connection behaves identically to a standalone connection: you get the full key browser, CLI console, server stats, and pub/sub monitor.
You do not need to know which node is the primary when you connect. As long as at least one Sentinel seed is reachable, CacheDeck will find it.
Automatic failover: what happens during a primary switch
The more important question for on-call use is what happens when the primary goes down while you are connected.
CacheDeck uses lazy failover detection. It does not maintain a background subscription to the Sentinel +switch-master channel, so it does not know about a failover the instant it happens. Instead, detection is triggered by the next command you send after the primary has failed.
Here is the sequence:
- You are connected and browsing keys on the old primary.
- The primary becomes unreachable. Sentinel promotes a replica.
- You tap to load a key or run a CLI command. CacheDeck attempts to send the command to the old primary address and gets a connection error.
- CacheDeck catches that error, re-queries the Sentinel seeds for the new primary address, and retries the command against the new primary.
- The key loads, the CLI command executes. You see a brief delay but no manual reconnect step.
The window between step 2 and step 3 is a period of silent unknowing: the app does not display a banner or notification while the primary is down and no command is in flight. This is a deliberate trade-off that avoids unnecessary background network activity, but it means the app does not proactively warn you about a failover in progress.
If you send a command while the failover election is still running and no primary is yet available, CacheDeck surfaces a typed error: sentinelFailover. This is not an infinite spinner; it tells you specifically that Sentinel has not yet elected a new primary. Retrying the command a few seconds later, once Sentinel has finished the promotion, will succeed.
If none of the Sentinel seeds respond at all, you will see sentinelNoMaster, which indicates the Sentinel tier itself is unreachable.
Honest caveats
Two limitations are worth knowing before you rely on CacheDeck for Sentinel access in production.
Failover detection is lazy, not proactive. CacheDeck does not subscribe to the Sentinel pub/sub channel in the background. Between the moment a primary fails and the moment you next send a command, the app has no indication that anything changed. In practice during an incident, you are actively querying data, so the window is short. But if you leave the app open on the screen while the primary recovers and watch the stats panel, it will continue to show the old primary’s last-known data until you trigger a command.
Read routing to replicas is not supported. CacheDeck connects exclusively to the primary discovered via Sentinel. It does not implement replica-set read routing. If your workload separates reads onto replicas at the application level, CacheDeck will always read from the primary. This is appropriate for most debugging and inspection tasks, but it is worth knowing if you are checking replica lag or testing replica-specific behavior.
Both of these are by design rather than bugs. The lazy approach keeps the app simple and battery-friendly; primary-only reads eliminate an entire class of stale-read confusion when you are debugging under pressure.
SSH tunnel and TLS with Sentinel
Sentinel connections support the same transport options as standalone connections. You can combine Sentinel discovery with an SSH tunnel if your Sentinel nodes are on a private subnet, or enable TLS if your Redis and Sentinel processes are configured to use encrypted connections.
The SSH tunnel and TLS settings apply to the final Redis connection (and optionally to the Sentinel communication itself), not just to the initial seed query. Configure them in the Security and SSH sections of the connection editor the same way you would for a standalone connection.
A typical secure setup for a private cluster: SSH tunnel to a bastion → Sentinel seeds on the private network → TLS-encrypted Redis connection to the discovered primary. CacheDeck handles all three layers in a single configured connection.
Step-by-step: Sentinel setup in CacheDeck
-
Open CacheDeck and tap + to create a new connection.
-
In the Sentinel section, add your seed addresses. Tap Add Sentinel and enter the hostname and port (default:
26379) for each Sentinel node. You can add one seed and it will work, but adding all three gives CacheDeck more paths to discovery if one node is temporarily unreachable. -
Enter the master name (the value you configured with
sentinel monitorinsentinel.conf). If you are unsure what it is, runredis-cli -p 26379 SENTINEL mastersfrom a machine that can reach the Sentinel tier; thenamefield in the output is what you need. -
Optionally configure your Redis password (if your primary requires authentication), TLS settings, or SSH tunnel in the respective sections.
-
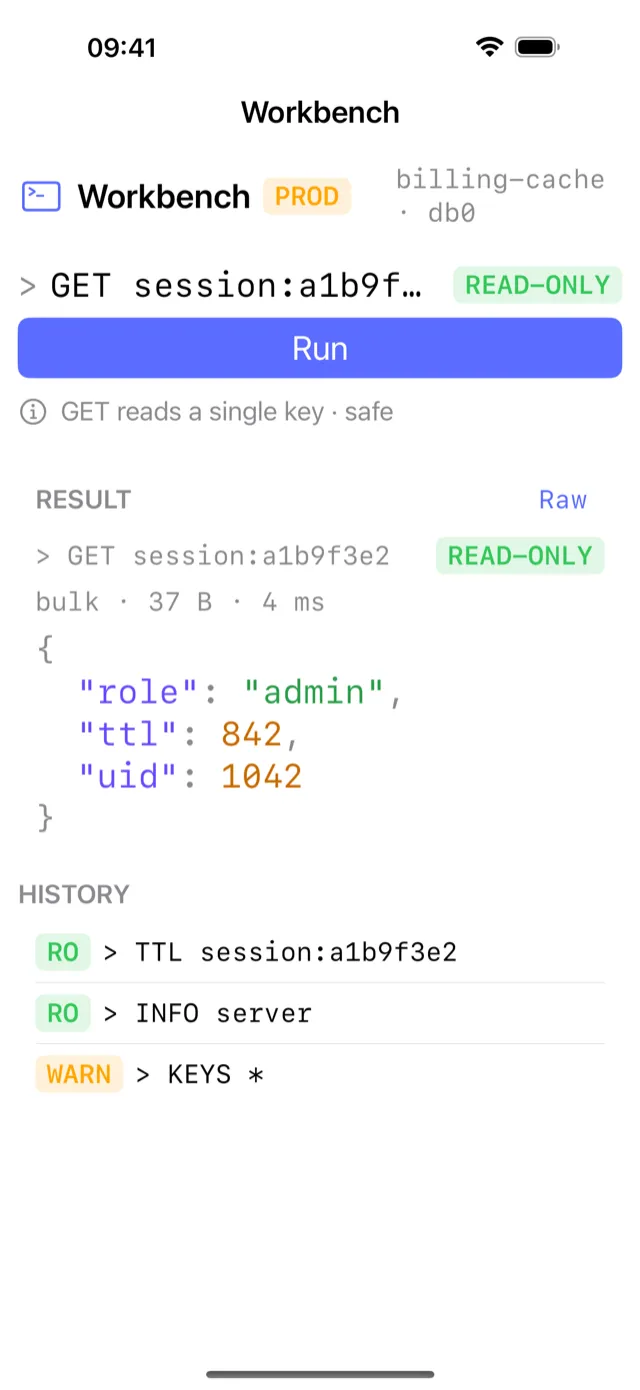
Give the connection a name. If the name contains
prod,production, orprd, CacheDeck will tag it PROD and require an extra confirmation tap before any write command executes. -
Tap Connect. CacheDeck queries the first reachable Sentinel seed, discovers the primary, and opens the connection. You land in the key browser.
From this point, failover is handled automatically on the next command. No manual reconnect needed.
CacheDeck is a native iOS Redis client built for DevOps engineers and SREs: Sentinel support, SSH tunnels, TLS 1.3, and iOS Keychain credential storage in a one-time $14.99 purchase. Redis is a trademark of Redis Ltd. and is used here in a nominative context only.
Related: Redis Client for iPhone: full feature overview · Redis iOS client comparison · How to SSH into Redis from iPhone · AWS ElastiCache on iPhone